Author: Arnel C. Reyes
Published: 23 July 2024
Last Updated: 25 July 2024
SSL Pinning is a security technique used in mobile applications to prevent man-in-the-middle (MITM) attacks by ensuring that the app communicates only with a trusted server. Bypassing SSL pinning involves circumventing this security measure, allowing an attacker to intercept and potentially manipulate data exchanged between the app and the server.
Important to Know About Bypassing SSL Pinning
Purpose of SSL Pinning
- To enhance security by binding the app to a specific server's SSL certificate, reducing the risk of MITM attacks.
- To ensure that the app only connects to trusted servers and that the data transmitted is secure and tamper-proof.
Techniques for Bypassing SSL Pinning
- Frida: A dynamic instrumentation toolkit that can inject scripts into running processes to bypass SSL pinning.
- Objection: A runtime mobile exploration toolkit powered by Frida, used to bypass SSL pinning among other security tests.
- Xposed Framework: A framework for modules that can change the behavior of the system and apps without touching APKs, often used in combination with specific SSL pinning bypass modules.
- Custom Certificate Authorities (CA): Adding a custom CA to the device's trusted certificate store to intercept and decrypt SSL traffic.
Common Methods
- Code Modification: Directly modifying the app's binary to disable SSL pinning checks.
- Hooking Functions: Using tools like Frida or Xposed to hook and bypass SSL pinning functions at runtime.
- Custom Patchers: Using automated tools that apply patches to bypass SSL pinning for specific apps.
The Procedures of Bypassing SSL Pinning
Bypassing SSL pinning involves using tools like Frida, a dynamic instrumentation toolkit, and Burp Suite, a web vulnerability scanner, to intercept and analyze the HTTPS traffic of a mobile application. Below are the detailed requirements and steps to achieve this.
Requirements:
- Hardware:
» Jailbroken iPhone: Necessary for installing and using Frida on the device. Steps to jailbreak iOS or iPhone device, click here.
» Computer: Running macOS, Windows, or Linux for setting up the environment and running Burp Suite.
- Software:
» Frida: A dynamic instrumentation toolkit for developers, reverse-engineers, and security researchers.
» Burp Suite: A tool for web security testing, which includes an intercepting proxy.
» Frida Server: To be installed on the jailbroken iPhone.
» Python: To run Frida scripts on computer.
» Frida Tools: CLI tools provided by Frida for interacting with the Frida server.
» Burp Suite CA Certificate: To be installed on the iPhone to intercept SSL traffic.
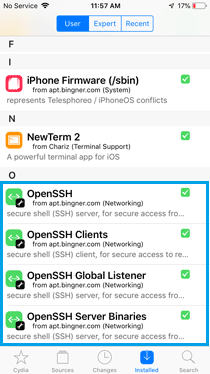
» NewTerm 2: Terminal emulator app for iOS to run shell command.
» OpenSSH Server: To access iOS shell remotely (Optional).
- Dependencies:
» pip: Python package manager for installing Frida tools.
» Homebrew: Package manager for macOS (optional but recommended for easy installation).
Steps:
Install Frida Server on iPhone
Walk through steps on installing and verifying Frida server on jailbroken iPhone, and ensure it is running correctly.
- Open Cydia:
» Launch the Cydia app on jailbroken iPhone.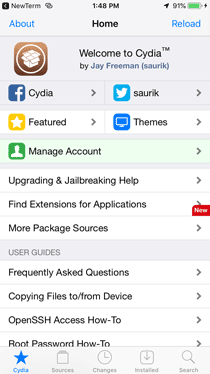
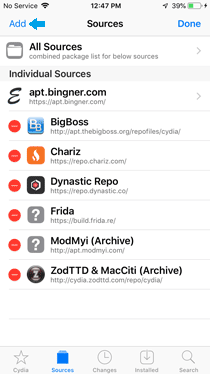
- Add the Frida Repository:
» Go to the "Sources" tab.
» Tap "Edit" and then "Add".
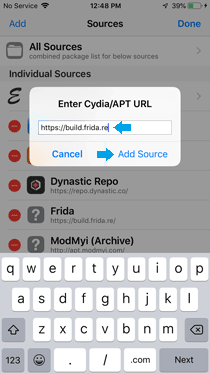
» Enter the repository URL: 'https://build.frida.re'.
» Tap "Add Source" and wait for the repository to be added.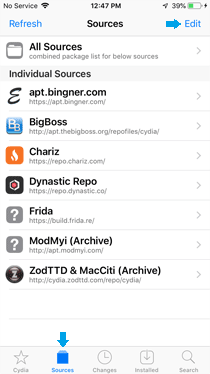

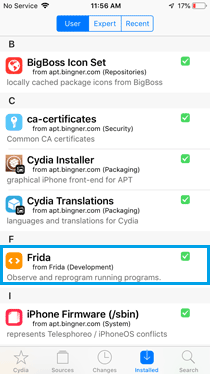
- Install Frida Server:
» After adding the repository, go to the "Search" tab.
» Search for "frida-server".
» Select the frida-server package and install it.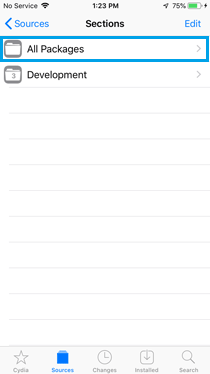

Install NewTerm 2 via Cydia
To open a terminal on a jailbroken iPhone, use a terminal application such as NewTerm 2 or later, which is available on Cydia. Here are the steps to install and use NewTerm 2:
- Open Cydia:
» Launch the Cydia app on jailbroken iPhone. - Search for NewTerm 2:
» Tap on the "Search" tab at the bottom.
» Type "NewTerm 2" into the search bar and find the package in the search results. - Install NewTerm 2:
» Tap on "NewTerm 2" from the search results.
» Tap "Install" in the upper right corner, then tap "Confirm".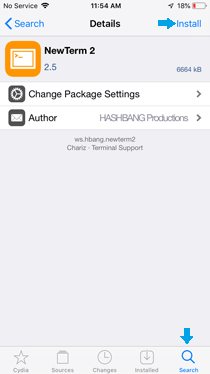
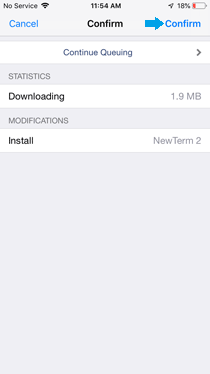
- Complete Installation:
» Wait for the installation process to complete.
» Tap "Return to Cydia" once the installation is finished.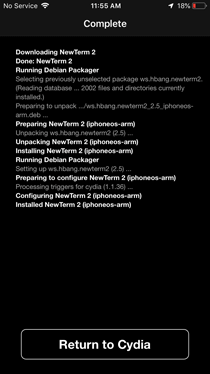
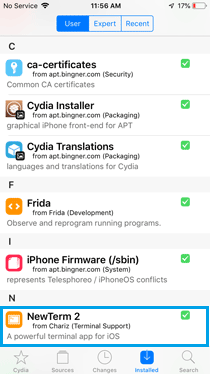
- Launch NewTerm 2:
» Find the NewTerm 2 app on home screen and tap to open it.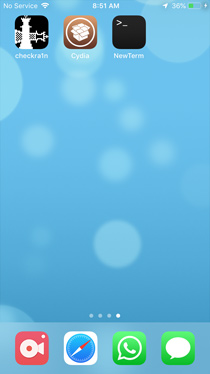
Install OpenSSH (Optional)
- Open Cydia:
» Launch the Cydia app on iPhone.
- Search for OpenSSH:
» Go to the "Search" tab and type "OpenSSH".
- Install OpenSSH:
» Tap on the OpenSSH package from the search results.
» Tap "Install" in the upper right corner, then tap "Confirm".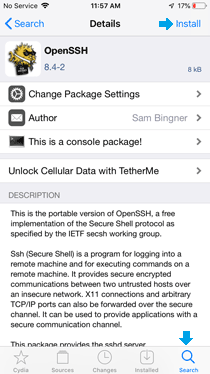
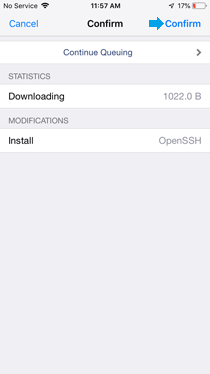
- Complete Installation:
» Wait for the installation process to complete.
» Tap "Return to Cydia" once the installation is finished.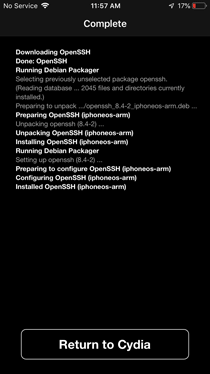
- Start the SSH Service
» After installing OpenSSH, the service should start automatically. If not, start it manually.
- Open NewTerm 2:
» Launch the NewTerm 2 app on iPhone.
» In the terminal, type 'su' to gain root access:
- Generate SSH Host Keys:
» In NewTerm 2, run the following commands to generate SSH host keys:
# ssh-keygen -A - Start SSH Service:
» Type the following command to start the SSH service:
# /usr/sbin/sshd - Verify SSH Service is Running:
» To verify that the SSH service is running, use the following command in NewTerm 2:
# ps aux | grep sshd
The SSH daemon ('sshd') should be seen on the list.
- Connect to iPhone via SSH:
» Once the SSH service is running, try connecting to iPhone from computer again:
$ ssh root@[iPhone.IP.Addess]
Make sure the correct IP address of the iPhone is used. Check the IP address on the iPhone under Settings > Wi-Fi > [Network] > IP Address.
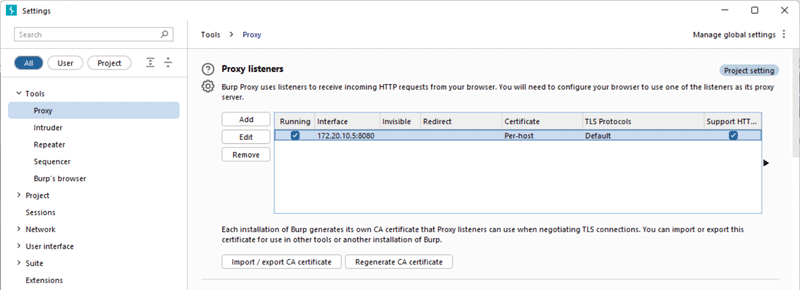
Install and Configure Burp Suite
- Download and Install Burp Suite:
» Installer: https://portswigger.net/burp/documentation/desktop/getting-started/download-and-install
» Launch Burp Suite and set up proxy listener. Typically, this will be on 127.0.0.1:8080. Click 'Edit' button to change the IP address to <computer.network.ip.address>:8080.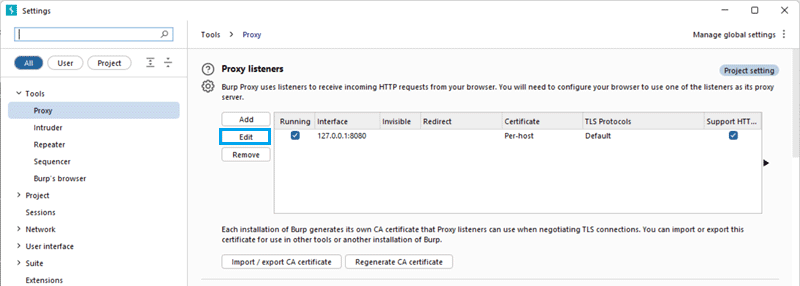

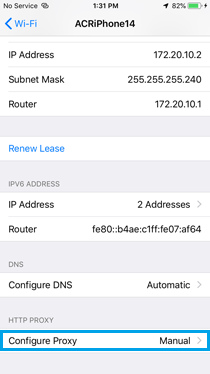
- Configure Proxy on iOS Device:
» Go to Wi-Fi settings on iOS device.
» Tap on the connected Wi-Fi network.
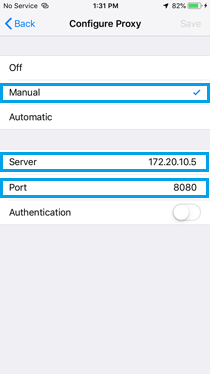
» Scroll down to "HTTP Proxy" and select "Manual."
» Set the server to computer’s IP address and the port to 8080 (or whichever port that the Burp Suite proxy is listening on).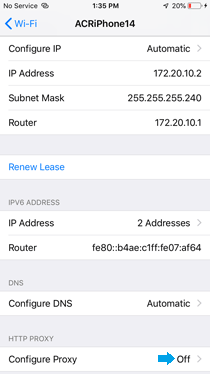
- Install Burp Suite CA Certificate on iOS Device:
» Open Safari on the iOS device and navigate to http://computer.network.ip.address:8080 (this will load Burp Suite's CA certificate page).
» Download the Burp CA certificate.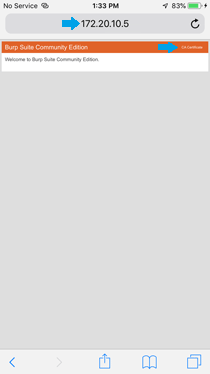
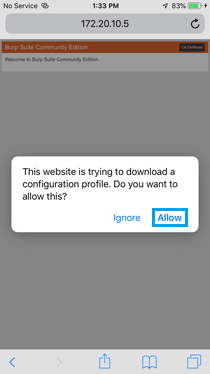

» Install the Burp CA certificate.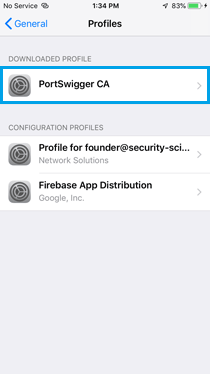
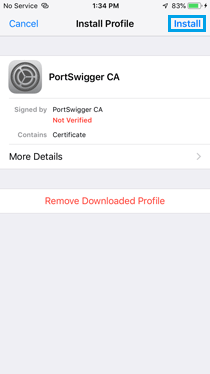
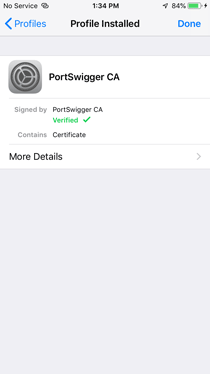
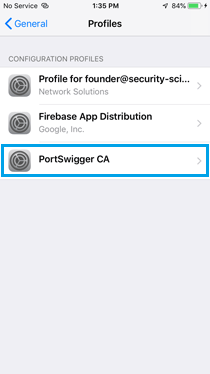
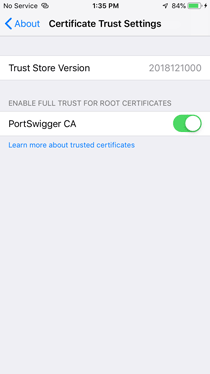
» Go to Settings > General > About > Certificate Trust Settings, and enable full trust for the Burp CA certificate.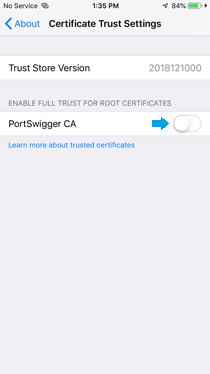

Start Frida Server
- Open Terminal on iPhone:
» If terminal app is not installed, install NewTerm 2 from Cydia.
» Open NewTerm 2 from home screen. - Gain Root Access:
» In the terminal, type:
$ su
» Enter root password (default is 'alpine' unless it was changed). - Start the Frida Server:
» Once gained root access, start the Frida server by typing:
# /usr/sbin/frida-server &
This command starts the Frida server in the background.
Install and Verify Frida Installation on Computer
- Install Python and pip on the Computer:
» Download and install Python from the Python website (https://www.python.org/downloads/). Make sure to check the "Add Python to PATH" box during installation. - Install frida-tools Using pip:
» Open Command Prompt on the computer.
» Install frida-tools and setuptools by running:
pip install frida-tools
pip install setuptools - Verify Frida Tools Installation:
» Check if Frida tools are installed by typing:
frida --version
Mount the Developer Disk Image
- Download precompiled binaries:
» Precompiled binaries can be downloaded from the following links:
› https://github.com/L1ghtmann/libimobiledevice/releases/
› https://github.com/libimobiledevice-win32/imobiledevice-net/release
- Extract the files:
» Extract the downloaded archive to a directory, e.g., 'C:\libimobiledevice' - Download the Developer Disk Image:
» Download the correct Developer Disk Image for the iOS version from the following link:
› https://github.com/mspvirajpatel/Xcode_Developer_Disk_Images/releases - Mount the Developer Disk Image:
» Open Command Prompt and navigate to the 'libimobiledevice' directory:
cd C:\libimobiledevice
» Use the 'ideviceimagemounter' command to mount the Developer Disk Image. Ensure the 'DeveloperDiskImage.dmg' and 'DeveloperDiskImage.dmg.signature' files are in the current directory or specify their full paths.
C:\libimobiledevice\ideviceimagemounter DeveloperDiskImage.dmg DeveloperDiskImage.dmg.signature
Uploading DeveloperDiskImage.dmg
done.
Mounting...
Image mounted successfully.
If it is only 'DeveloperDiskImage.dmg', use the following command:
C:\libimobiledevice\ideviceimagemounter DeveloperDiskImage.dmg
Uploading DeveloperDiskImage.dmg
done.
Mounting...
Image mounted successfully.
If encounters any errors such as 'ImageMountFailed', make sure the Developer Disk Image is compatible with the iOS version and have the correct '.dmg' and '.signature' files. - Verifying the Mount:
» After running the above command, it should be seen the output indicating the Developer Disk Image has been mounted successfully.
» The mounting can be verified by using 'frida-ps -U' to list running processes on the device. If it works without error, the image is mounted correctly.
Connect to Frida Server on iPhone
- Connect iPhone to the Computer:
» Use a USB cable to connect iPhone to the computer. - Verify Connection:
» On the computer, check the list of devices connected to the computer and the target's running app package name by running the following command:
frida-ls-devices
Id Type Name OS
---------------------------------------- ------ --------------- ------------------
local local ACRMASTER Windows 10.0.22631
xxxxxx4ba2801de17xxxxxxa101f870fe4xxxxxx usb ACR iPhone OS 12.5.7
barebone remote GDB Remote Stub
socket remote Local Socket
frida-ps -Uia
PID Name Identifier
---- ------------- ---------------------------------------
2413 Cydia com.saurik.Cydia
2335 Mail com.apple.mobilemail
2779 NewTerm ws.hbang.Terminal
2748 Safari com.apple.mobilesafari
2743 Settings com.apple.Preferences
- Acrobat com.adobe.Adobe-Reader
- AltStore com.R2F2XV88H5.com.rileytestut.AltStore
- App Store com.apple.AppStore
- Authenticator com.skyrisenetworks.auth
- Books com.apple.iBooks
- Calculator com.apple.calculator
- Calendar com.apple.mobilecal
- Camera com.apple.camera
- Clock com.apple.mobiletimer
- Compass com.apple.compass
- Contacts com.apple.MobileAddressBook
- FaceTime com.apple.facetime
- Facebook com.facebook.Facebook
- Files com.apple.DocumentsApp
- Find iPhone com.apple.mobileme.fmip1
- Google Earth com.google.b612
- Google Maps com.google.Maps
- Health com.apple.Health
- Home com.apple.Home
- Keynote com.apple.Keynote
- Maps com.apple.Maps
- Messages com.apple.MobileSMS
- Messenger com.facebook.Messenger
- Music com.apple.Music
- News com.apple.news
- Notes com.apple.mobilenotes
- Numbers com.apple.Numbers
- Pages com.apple.Pages
- Phone com.apple.mobilephone
- Photos com.apple.mobileslideshow
- Podcasts com.apple.podcasts
- Reminders com.apple.reminders
- Stocks com.apple.stocks
- TV com.apple.tv
- Tips com.apple.tips
- Voice Memos com.apple.VoiceMemos
- Wallet com.apple.Passbook
- Watch com.apple.Bridge
- Weather com.apple.weather
- checkra1n kjc.loader
- iTunes Store com.apple.MobileStore
- iTunes U com.apple.itunesu
This command should list all running processes on iPhone, indicating that the Frida server is running and connected correctly. - Bypass SSL Pinning:
» Run 'objection' to explore, inject the agent, and explore the app. The target application will be running again with the new session.
objection -g com.saurik.Cydia explore
For this example, Cydia is just a sample app. - Disable SSL Pinning with Objection:
» In the Objection interactive console, run the following command to disable SSL pinning.
ios sslpinning disable - Test SSL Pinning Bypass:
» With SSL pinning disabled, use the app normally and observe the traffic in Burp Suite.
» It should now be able to intercept and modify HTTPS traffic from the app.
Troubleshooting
If encounter issues, try the following:
- Ensure Frida Server is Running:
» On the iPhone, check if the Frida server process is running by using:
# ps aux | grep frida
» If it’s not running, start it again with the following command:
# /usr/sbin/frida-server & - Check USB Connection:
» Make sure the USB connection between the iPhone and computer is stable and that the computer recognizes the iPhone. - Restart Devices:
» Restart both the iPhone and computer to clear any temporary issues. - Ensure Burp Suite CA certificate is Trusted:
» If encounter issues, make sure the iOS device is properly configured to trust the Burp Suite CA certificate. - Ensure is Frida injected:
» Check that the app is correctly running with Frida injected - Write Frida Script:
» If the app still uses SSL pinning methods not covered by Objection, it may need to manually hook these methods using Frida scripts.
» Write a Frida script to bypass SSL pinning based on findings. Here's a basic example structure:
// bypass-ssl-pinning.js
if (ObjC.available) {
try {
// Implement the NSURLSessionDelegate
var MyNSURLSessionDelegate = ObjC.registerClass({
name: 'MyNSURLSessionDelegate',
protocols: ['NSURLSessionDelegate'],
methods: {
'URLSession:didReceiveChallenge:completionHandler:': function (session, challenge, completionHandler) {
console.log('URLSession:didReceiveChallenge:completionHandler: called');
var protectionSpace = challenge.protectionSpace();
var serverTrust = protectionSpace.serverTrust();
var credential = ObjC.classes.NSURLCredential.credentialForTrust_(serverTrust);
challenge.sender().useCredential_forAuthenticationChallenge_(credential, challenge);
completionHandler(ObjC.classes.NSURLSessionAuthChallengeDisposition.NSURLSessionAuthChallengeUseCredential, credential);
}
}
});
// Hook NSURLSession's init method to use custom delegate
var sessionInitHook = ObjC.classes.NSURLSession['- initWithConfiguration:delegate:delegateQueue:'];
Interceptor.attach(sessionInitHook.implementation, {
onEnter: function (args) {
console.log('Intercepted NSURLSession init');
args[3] = MyNSURLSessionDelegate.alloc().init();
},
onLeave: function (retval) {
console.log('NSURLSession initWithConfiguration:delegate:delegateQueue: hooked');
}
});
console.log('SSL pinning hooks applied successfully');
} catch (e) {
console.log('Exception: ' + e.message);
}
} else {
console.log('Objective-C runtime is not available!');
}
» Use Frida to inject script into the running app process on the iOS device. Here’s an example command:
frida -U -f com.example.MyApp -l bypass-ssl-pinning.js
Additional Tips
- Keep Frida and Objection tools updated to the latest versions to benefit from the latest bypass techniques.
- If an app uses advanced SSL pinning techniques, it may need to write custom Frida scripts to bypass these checks.
Remediation and Mitigation
- Implement Strong SSL Pinning:
» Implement robust SSL pinning techniques alongside client certificate validation to ensure maximum security.
» Perform certificate validation correctly, checking the full certificate chain and ensuring the certificate matches the pinned certificate.
» Regularly update the pinned certificates and ensure they are securely embedded within the application. - Deploy Client Certificates:
» Issue unique client certificates to each authorized instance of the application.
» Configure the server to require and validate these certificates during the SSL/TLS handshake. - Secure Certificate Storage:
» Ensure that client certificates are securely stored within the application, using secure storage mechanisms provided by the operating system (e.g., iOS Keychain).
» Implement mechanisms to securely distribute and renew client certificates. - Obfuscate Security Mechanisms:
» Obfuscate the SSL pinning implementation within the app code to make it more challenging for attackers to locate and bypass the pinning logic. - Multi-Layered Security:
» Combine SSL pinning with other security measures such as certificate transparency and public key pinning.
» Regularly update the pinned certificates and the pinning logic to adapt to new threats. - Combine with Other Security Measures:
» Use additional security measures such as certificate transparency, HSTS, and RASP to further protect the application.
» Monitor and log all authentication attempts and SSL/TLS handshakes to detect and respond to potential attacks. - Regular Security Audits and Penetration Testing:
» Conduct regular security audits and penetration testing to identify and address vulnerabilities related to SSL pinning and client certificate validation.
» Stay updated with the latest security best practices and integrate them into the application. - Monitor and Respond:
» Monitor for unusual traffic patterns that may indicate an SSL pinning bypass attempt.
» Implement anomaly detection systems to identify and respond to potential MITM attacks. - Education and Awareness:
» Educate developers on the importance of SSL pinning and the potential risks associated with bypass techniques.
» Conduct regular security training and code reviews focused on secure coding practices related to SSL/TLS. - User Awareness:
» Encourage users to keep their devices updated and to avoid installing untrusted applications that may compromise security.
Bypassing SSL pinning is a critical vulnerability that can expose sensitive data to attackers. Implementing robust SSL pinning techniques, combined with comprehensive security practices, can significantly reduce the risk of successful bypass attempts.
References
https://frida.re
https://libimobiledevice.org
https://github.com/frida/frida/releases
Disclaimer: This documentation is intended for educational purposes only. The content provided herein is meant to inform and educate individuals about security practices, techniques, and tools. Security-Science does not support, endorse, or encourage any illegal or unethical activities, including but not limited to unauthorized access to computer systems, networks, or data. Users are advised to apply the knowledge gained responsibly and ensure compliance with all applicable laws and regulations. Security-Science shall not be held liable for any misuse of the information provided.